
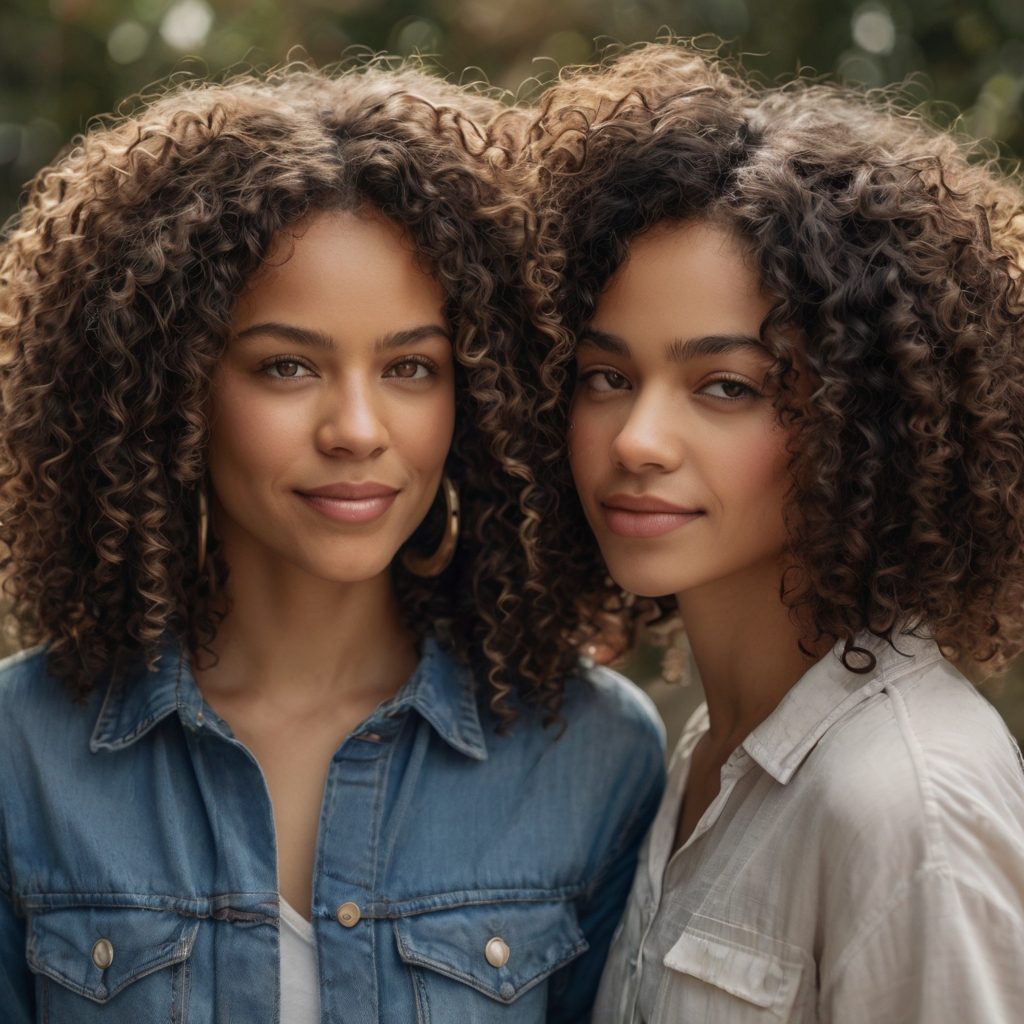
Welcome to the fascinating world of natural curls! If you’re here, chances are you’re tired of battling frizz, dryness, or just want to learn how to love and care for your curls the right way. Don’t worry, you’re not alone. Many curly women have gone through the same process of discovery, and with this guide, we’ll equip you with everything you need to begin your journey to healthy, defined, and bouncy curls. Get ready for a change of mindset and routine, because your curls are about to take center stage. 1.
Understanding Your Curls: The Foundation of Care
Before we dive into products and techniques, it’s crucial to understand what hair type you’re working with. This isn’t to pigeonhole you, but to help you choose the products and methods that best suit your specific needs.
a. Curl Type (Curl Pattern)
Curls are commonly classified from 2 to 4, with subcategories A, B, and C indicating the curl width:
Type 2 (Wavy): Hair forms a soft “S” shape.
- 2A: Very soft, almost straight waves.
- 2B: More defined waves, but closer to the head.
- 2C: More pronounced waves, with some defined curls, which begin to rise from the roots.
Type 3 (Curly): Hair forms well-defined spirals or coils.
- 3A: Loose, large curls.
- 3B: Tighter, corkscrew-like curls.
- 3C: Very tight, ringlet-like curls with a lot of volume.
Type 4 (Afro or Kinky): Hair forms very tight “Z” patterns or very dense, small curls.
- 4A: Very small “S”-shaped curls.
- 4B: More angular “Z”-shaped curls.
- 4C: Extremely tight curl patterns, with a lot of shrinkage.
Why is this important? 2A hair doesn’t need the same heavy products as 4C, which requires much more moisture. Knowing your type will point you in the right direction.
b. Hair Density This refers to the number of individual hairs on your head. You can have low, medium, or high density.
- Low density: You can easily see your scalp. Heavy products can weigh your hair down.
- High density: You can hardly see your scalp. Your hair may need more product to saturate.
c. Hair Porosity This is one of the most important characteristics. Porosity refers to your hair’s ability to absorb and retain moisture. It is determined by how open or closed your hair cuticles are.
- Low Porosity: The cuticles are very closed. Water and products take time to penetrate, but once inside, they are well retained. It tends to accumulate product buildup. Tip: Use gentle heat (a heat cap) to open the cuticles during treatments. Opt for lightweight products without heavy silicones.
- Medium Porosity: The cuticles are slightly open. The hair absorbs and retains moisture well. This is the easiest porosity type to manage. Tip: Most products work well. Maintain a balanced routine.
- High Porosity: The cuticles are very open (due to heat damage, chemicals, etc.). The hair absorbs moisture quickly, but also loses it easily. It tends to be dry and prone to frizz. Tip: Needs lots of hydration and sealing products. Use heavier oils and conditioners.
How to know your porosity? (Glass of Water Test): Take a strand of clean hair (without any products) and drop it into a glass of water at room temperature.
- If it floats to the surface: Low porosity.
- If it slowly sinks to the middle: Medium porosity.
- If it quickly sinks to the bottom: High porosity.
Ingredients: Your Best Friend (and Enemy)
This is a fundamental pillar of curly hair care. Many conventional products contain ingredients that can be harmful to curls.
a. Ingredients to Avoid (or Use with Caution):
- Sulfates (SLS, SLES, ALS, ALES): Harsh detergents that clean too thoroughly, stripping hair of its natural oils and leaving it dry and frizzy. Alternatives: Sulfate-free shampoos or co-washing. Water-Insoluble
- Silicones (Dimethicone, Cyclopentasiloxane, Amodimethicone, Cetearyl Methicone): These silicones create a film on the hair that makes it look shiny and soft, but they prevent moisture from penetrating. They accumulate and require sulfates to be removed. Alternatives: Look for water-soluble silicones (those ending in -diol, -PEG).
- Drying Alcohols (Ethanol, Isopropyl Alcohol, Alcohol Denat., Propanol): These evaporate moisture from the hair, causing dryness and frizz. Alternatives: Fatty alcohols (Cetyl Alcohol, Stearyl Alcohol, Cetearyl Alcohol) are good, as they provide hydration.
- Mineral Oils and Paraffins (Mineral Oil, Paraffinum Liquidum, Petrolatum): Derived fromPetroleum jelly coats the hair, but doesn’t nourish or hydrate it. It can cause buildup.
b. Curl-Friendly Ingredients:
- Humidifiers (Glycerin, Sorbitol, Panthenol, Propylene Glycol, Honey): Draw moisture from the air into the hair. Ideal in humid climates, but can cause frizz in dry climates.
- Proteins (Hydrolyzed Wheat Protein, Silk Protein, Keratin, Collagen): Strengthen the hair strand, especially if you have high porosity or damaged hair. Use sparingly; excess can make hair stiff.
- Natural Oils (Coconut, Olive, Avocado, Jojoba, Argan, Almond): Provide hydration, seal in moisture, and add shine.
- Natural Butters (Shea Butter, Cocoa, Mango): Highly nourishing, ideal for very dry or coarse hair.
- Botanical Extracts (Aloe Vera, Green Tea, Chamomile, Rosemary): Soothe the scalp, provide nutrients, and specific benefits.
3. Your New Routine: Step-by-Step for Healthy Curls
It’s time to put theory into practice. This routine is a foundation that you can adapt according to your hair’s needs.
a. Cleansing: Frequency: Curls don’t need to be washed as often as straight hair, as natural oils take longer to travel through the curl coil. Washing every 3-7 days is usually sufficient. Experiment to find your frequency.
- Cleanser Type: Sulfate-Free Shampoo (Low-Poo): Gently cleanses without stripping all natural oils. Ideal for most curl types.
- Co-Wash: Cleansing conditioner. Contains no foaming agents, gently cleanses while moisturizing. Excellent for very dry, coarse, or high-porosity hair.
- Clarifying Shampoo: A shampoo with sulfates or harsher ingredients that’s used occasionally (once a month or every two months) to remove product buildup. It’s important to rehydrate well afterward.
- How to Wash:
- Wet thoroughly: Make sure all your hair is soaked.
- Apply to the scalp: Concentrate the shampoo or co-wash on your scalp, gently massaging with your fingertips to thoroughly cleanse. Let the lather (if using shampoo) or product glide through your strands; there’s no need to scrub the ends.
- Rinse well: Make sure all the product is removed.
b. Conditioning: This is perhaps the most important step for curls. Conditioner is your best friend.
- After Washing: Apply a generous amount of conditioner from the mid-lengths to the ends. If your hair is very dry, you can apply a little closer to the roots, avoiding the scalp if it’s oily.
- Detangle Carefully: With the conditioner still in your hair, use your fingers, a wide-tooth comb, or a curl-specific brush (like a Denman Brush) to gently detangle, starting at the ends and working your way up to the roots. Never detangle dry curly hair.
- “Squish to Condish”: This technique is a lifesaver. With hair saturated with conditioner, tilt your head and “squeeze” or “squeeze” the curls toward the scalp with the palms of your hands, creating a “squish” sound.
This helps the water and conditioner penetrate better and form curl patterns. Rinse only partially if your hair is very dry, or completely if you need less weight.
c. Deep Conditioning Treatments: Once or twice a week (or as needed), your curls will appreciate a deep treatment mask. Benefits: Intense hydration, damage repair, strengthening.
- Application: After shampooing and conditioning (or instead of conditioner), apply a mask generously, concentrating on the ends. Leave on for the indicated time (15-30 minutes). You can use a heat cap or plastic bag to enhance heat penetration.
- Rinse: Rinse well.
d. Leave-in Conditioner: This is a non-negotiable product for most curls.
- Function: Provides an extra layer of moisture and helps detangle and prepare hair for definition.
- Application: While hair is still wet (essential), apply a small amount of leave-in, distributing it evenly.
e. Styling: This is where your curls take shape. There are many products and techniques, but these are the basics:
- Gel: Creates a protective “coat” that maintains the curl pattern. It’s ideal for definition and frizz control. It can form a “cast” (hard layer) that breaks once the hair dries.
- Curl Cream: Provides hydration and helps clump curls. Less hold than gel, but more hydration. Ideal for looser curls or for those looking for less “cast.”
- Mousse: Lightweight and volumizing, with a softer hold than gel.
Application Techniques (with very wet hair):
- “Rake and Shake”: Distribute the product with your fingers, combing through the hair and then gently shaking the section to form the curl.
- “Praying Hands”: Rub the product between your palms and then gently clap sections of hair between them, as if praying. This helps seal the cuticle.
- “Scrunching”: Once the product is applied, scrunch the hair toward the scalp to encourage curl formation and volume.
Drying:
- Microfiber Towel or Cotton T-Shirt: Never use a regular cotton towel, as its rough texture causes friction, frizz, and breaks curl patterns. Use a microfiber towel or an old cotton T-shirt to gently remove excess water, squeezing, not rubbing.
- Air Drying: The healthiest option for your hair. Let your curls dry completely without heat. This can take hours, depending on your density and porosity.
- Diffuser: If you need to dry faster or want more volume, a diffuser is your best friend. Set your dryer to a low heat setting and low to medium speed. Tilt your head and place sections of hair in the diffuser basket, holding it close to your scalp. Blow-dry without moving until the section is almost dry (approximately 30 seconds per section). Then, move to another section. Avoid touching your hair too much while drying, as this can cause frizz. Once dry, if you have a hard cast from the gel, gently break up the cast by scrunching your curls with your hands or a microfiber towel to release softness and shine.
4. Maintaining Your Curls Between Washes: The Day After The days after washing are key to maintaining definition and minimizing frizz.
- Night Protection: Pineapple: Create a loose ponytail on top of your head to avoid flattening your curls.
- Use a silk or satin scrunchie. Satin/Silk Bonnet or Satin/Silk Pillowcase: Reduces friction and helps retain moisture, preventing frizz and tangling.
- Refresh Your Curls: In the morning, if your curls have lost definition or are frizzy:
- Water Spray: Lightly dampen your hair with a water spray (you can add a little leave-in conditioner).
- Refreshing Product: Use a lightweight cream, a gentle gel, or a refreshing spray specifically formulated for this.
- Technique: Gently scrunch your curls to revive them. Avoid over-saturating, as this can cause frizz.
5. Additional Tips for Beginners
- Patience: Curly hair is a journey, not a destination. You’ll see gradual improvements, not overnight.
- Moisturizing is Key: Most curl issues (frizz, dryness) are due to a lack of moisture. Moisturize, moisturize, moisturize!
- Less is More (Sometimes): Don’t saturate your curls with too many products, especially in the beginning. Start small and add if necessary.
- Listen to Your Hair: What works for one person won’t work for another. Observe how your hair reacts to products and techniques.
- Haircuts: Find a stylist who specializes in curly hair. A good cut can make a world of difference in the shape and volume of your curls. Layered cuts often work well for shaping.
- Avoid Excessive Heat: Heat tools (flat irons, curling irons) can permanently damage your curl pattern. If you must use them, do so sparingly and always use heat protectant.
- Join the Community: There are tons of online communities (Facebook groups, Instagram, YouTube) of curly women sharing tips, products, and experiences. Take advantage of this resource!
Conclusion
Congratulations, you’ve taken the first big step on your curly journey. Remember that caring for curly hair is a form of self-care and embracing your natural beauty. Don’t be discouraged by “bad curl days” (we all have them). With this guide as your starting point, and a willingness to experiment and learn, you’ll be on your way to having the healthy, vibrant, and beautiful curls you’ve always wanted. Enjoy the process and love your curls!
Leave a Reply